
How to Use EMS Foot Massager: A Complete Step-by-Step Guide
The integration of Electrical Muscle Stimulation (EMS) technology into personal wellness devices has revolutionized how we approach muscle recovery and relaxation at home. Learning how to use EMS foot massager devices properly is essential for maximizing their benefits while ensuring safety and comfort. This comprehensive guide covers everything from initial setup to advanced techniques for three popular device types: the dedicated EMS foot massager, the versatile EMS foot massager pad, and the comprehensive EMS massage mat. Whether you’re seeking relief from foot pain, improved circulation, or simple relaxation, mastering these techniques will help you achieve optimal results.
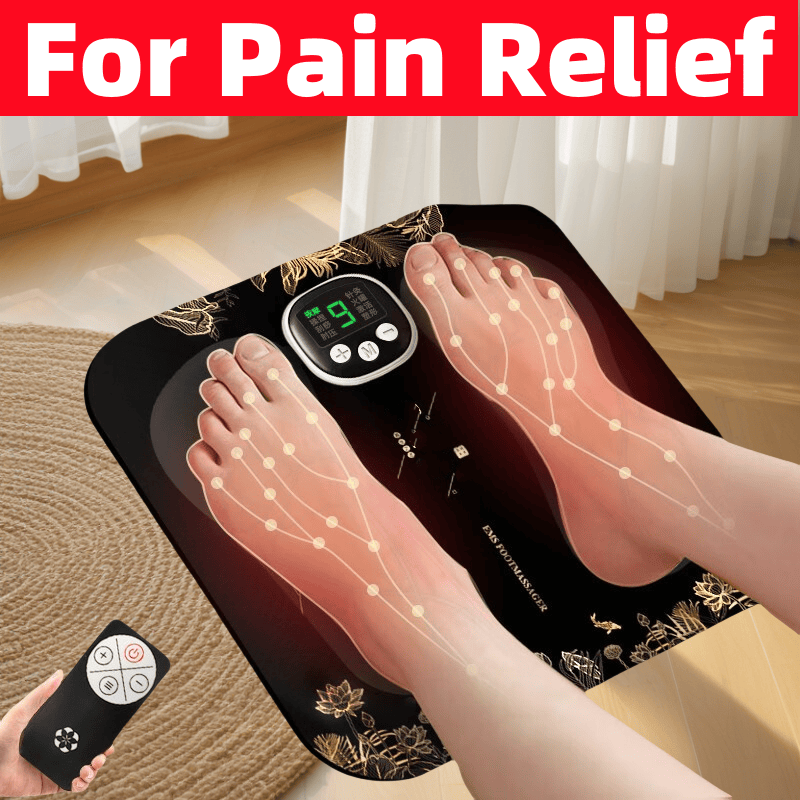
EMS Foot Massager Pad Price, Muscle Stimulator Mat
Understanding EMS Technology Basics
Before diving into usage instructions, it’s helpful to understand what makes EMS technology unique. Unlike traditional massagers that use mechanical pressure, EMS devices deliver gentle electrical impulses that stimulate motor nerves, causing muscles to contract and relax. This process can help reduce muscle tension, improve blood flow, and alleviate discomfort without applying intense physical pressure to sensitive areas.
Pre-Use Preparation: Setting the Stage for Success
Proper preparation ensures both safety and effectiveness when using your EMS device.
Medical Considerations
Consult Your Healthcare Provider: If you have any medical conditions, particularly pregnancy, heart issues, neurological disorders, or implanted electronic devices, consult a doctor before use.
Understand Contraindications: Do not use EMS devices if you have deep vein thrombosis, open wounds, skin infections, or fever.
Device Preparation
Charge Fully: For cordless models, ensure the device is fully charged before first use.
Inspect Components: Check for any damaged wires, electrodes, or housing.
Clean Your Feet: Wash and thoroughly dry your feet to ensure optimal electrode contact.
Prepare Your Space: Choose a comfortable chair with proper back support and adequate lighting.
Step-by-Step Guide: Using Your EMS Foot Massager
Follow these detailed steps for safe and effective sessions with your EMS device.
Step 1: Initial Setup and Positioning
For dedicated EMS foot massager units:
Place the unit on a flat, stable surface in front of your chair
Ensure the power cord (if applicable) is positioned safely to avoid tripping
Sit comfortably with your back supported and feet resting naturally
For EMS foot massager pad devices:
Place the pad on the floor or on a stable surface
Connect the pad to the control unit if not permanently attached
Ensure the connection is secure and wires are not twisted
For EMS massage mat:
Unroll the mat on a flat surface
Position the foot electrode areas where you plan to place your feet
Ensure the mat lies flat without wrinkles that might affect electrode contact
Step 2: Power On and Initial Settings
Turn On the Device: Press the power button—most devices will beep or light up
Select Language/Preferences: If your device has multiple language options, set your preference
Set Timer: Begin with a 15-minute session for your first few uses
Choose Low Intensity: Start at the lowest setting (typically level 1 or 2)
Step 3: Proper Foot Placement
Critical positioning tips:
Place bare feet firmly against the electrodes
Ensure full contact, particularly with the arch and heel areas
Avoid shifting position during sessions to maintain consistent stimulation
For mats, position feet according to electrode markings
Step 4: Program Selection
Modern EMS devices offer multiple programs targeting different needs:
Common program options:
Relaxation Mode: Gentle, wave-like patterns ideal for beginners
Recovery Mode: Focused on muscle recovery after activity
Activation Mode: More intense patterns for stimulating circulation
Acupressure Mode: Targets specific reflexology points
Selection strategy:
Start with relaxation mode for initial sessions
Experiment with different programs once comfortable with the sensation
Note which programs feel most beneficial for your specific needs
Step 5: Intensity Adjustment
The most crucial aspect of EMS use:
Begin at minimum setting: Never start at high intensity
Increase gradually: Move up one level every 30-60 seconds
Find your “sweet spot”: The ideal intensity produces strong but comfortable muscle contractions
Respect pain signals: If you experience pain, reduce intensity immediately
Adapt to sensitivity: Your ideal intensity may vary daily based on fatigue, hydration, and other factors
Step 6: Session Management
During your session:
Relax and breathe deeply—avoid tensing other muscles
Notice how your feet and calves respond to the stimulation
Make minor adjustments if you experience discomfort
Stay hydrated by keeping water nearby
Session duration guidelines:
Beginners: 10-15 minutes
Regular users: 15-20 minutes
Maximum recommended: 30 minutes (check manufacturer guidelines)
Step 7: Proper Shutdown and Aftercare
Ending your session correctly:
Gradually decrease intensity: Reduce to the lowest setting before turning off
Power down properly: Use the power button rather than simply unplugging
Gently remove feet: Lift feet straight up rather than sliding them off
Disconnect components: For devices with separate pads and control units
Post-session care:
Hydrate with water to support circulation
Perform gentle foot stretches if desired
Note any reactions or preferences for future sessions
Allow the device to cool if necessary before storing
Advanced Techniques and Tips
Once comfortable with basic operation, these techniques can enhance your experience:
Targeted Application
For specific concerns:
Arch support: Focus on programs that emphasize arch stimulation
Heel pain: Use modes with concentrated heel pressure
Circulation boost: Choose programs with rhythmic pumping actions
Overall relaxation: Select full-foot coverage patterns
Integration with Other Modalities
Combine with:
Warm-up: Use on low settings before physical activity
Recovery: Alternate with foam rolling or gentle stretching
Evening routine: Incorporate into wind-down rituals before bed
Work breaks: Use during breaks from sitting or standing
Progressive Usage Strategy
Week-by-week approach:
Weeks 1-2: Familiarization phase—low intensity, short sessions
Weeks 3-4: Exploration phase—try different programs, moderate intensity
Week 5+: Maintenance phase—established routine with optimal settings
Cleaning and Maintenance
Proper care extends device lifespan and ensures hygiene:
Regular Cleaning
After each use: Wipe electrodes with a slightly damp cloth
Weekly: Clean with manufacturer-recommended solutions
Monthly: Inspect wires and connections for wear
Storage Guidelines
Store in a cool, dry place away from direct sunlight
Avoid bending wires sharply during storage
Keep original packaging for optimal protection
Troubleshooting Common Issues
Problem: No sensation despite maximum settings
Solution: Check skin dryness—slightly dampen feet; ensure proper connection
Problem: Uneven stimulation between feet
Solution: Adjust foot placement; check electrode cleanliness
Problem: Device turns off unexpectedly
Solution: Check auto-shutoff timer; ensure adequate battery charge
Problem: Uncomfortable sensation
Solution: Reduce intensity immediately; try different program
Safety Precautions and When to Stop
Immediately discontinue use if you experience:
Sharp or shooting pain
Muscle cramping that persists after stopping
Skin irritation or burning sensations
Dizziness or lightheadedness
Irregular heart rhythms
Special considerations:
Never use while driving or operating machinery
Avoid use immediately after meals
Do not use on numb or insensitive areas
Discontinue use during pregnancy unless approved by a doctor
Creating an Optimal EMS Routine
Sample routines for different needs:
Morning energizing routine:
10-minute session at moderate intensity
Use activation or circulation programs
Follow with gentle foot exercises
Evening relaxation routine:
15-minute session at low-to-moderate intensity
Use relaxation or recovery programs
Combine with deep breathing exercises
Post-activity recovery routine:
20-minute session at low intensity
Use recovery-specific programs
Follow with hydration and proper nutrition
Conclusion: Mastering Your EMS Experience
Learning how to use EMS foot massager devices effectively opens up new possibilities for home-based wellness care. By following these detailed instructions for EMS foot massager, EMS foot massager pad, and EMS massage mat devices, you can safely enjoy the numerous benefits of this technology. Remember that consistency and proper technique are more important than intensity or duration. Start slowly, listen to your body’s feedback, and gradually develop a routine that addresses your specific needs. With regular, proper use, EMS technology can become a valuable component of your overall health and wellness strategy, providing relief, relaxation, and recovery right at your feet.
Related topics:
The Heft and Feel: What to Expect from the Weight of a Tungsten Ring
The Scratch-Resistant Promise: How Hard Are Tungsten Rings Really?
How to Personalize Your Tungsten Ring: Inlays, Finishes, and Designs